Getting Started with Gumball
Browse Shows
Last updated 3/31/2023
With Gumball, you can browse a rich marketplace of shows to find the perfect fit for your brand. Search shows by:
- Show Type: Click the dropdown to select either audio only, video only, or audio + video simulcast shows.
- Keywords: Gumball indexes show and episode descriptions to help you find the most relevant options. Try searching anything from a person's name to a specific topic to find shows where these have been featured.
- Categories: Categories are chosen based on the show's Apple Podcasts category. Choose one or multiple to hone in your search.
- Airing Between: If your campaign needs to run in a specific time frame, use this feature to search for shows with availability in your selected date range.
- Audience Gender: Move this slider to find shows that match your ideal gender breakdown.
- Audience Age Range: Select one or multiple of these age ranges to find shows that meet your preferred listener demographic.
Find a show in your search that looks like it might be a good fit? Click on it to learn more:
If you're ready to book, click the Book Now button to Book Your First Campaign.
Book Your First Campaign
Last updated 4/4/2023
After using the Browse Shows page to find a few shows that fit your demo, it's time to book your campaign. In order to do so, you'll first need to fill out some info:
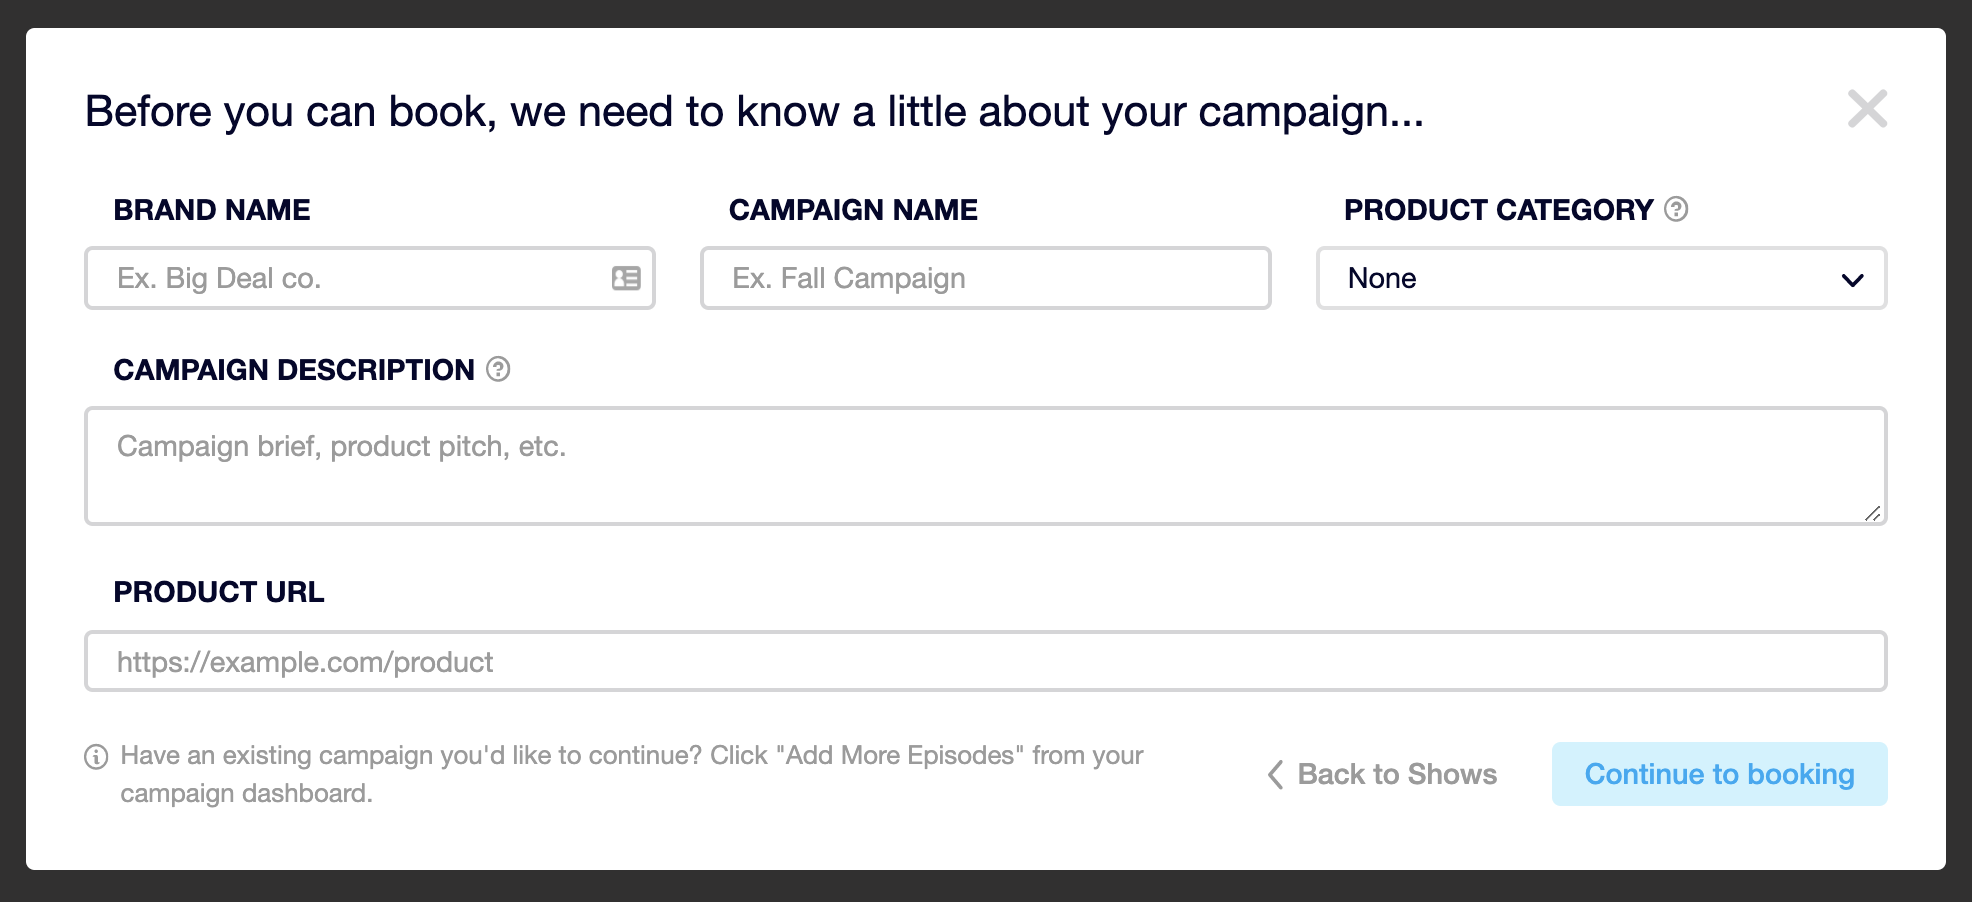
- Brand Name: Add you brand name so creators know what you're advertising.
- Campaign Name: Choose a name for your campaign. This will be how it's labeled on your Dashboard.
- Product Category: Choose a category from the drop down that best fits the product you're advertising. Choosing a category ensures that your ads will not run alongside competitors within the same episode. If you'd like to request a category be added, contact us.
- Campaign Description: Describe your brand and what you're advertising. Creators will see this when you purchase a spot and use this info to determine whether or not they want to move forward with the ads.
- We recommend adding a brief description, a link to a product deck, or anything you think will be helpful in understanding your campaign goals.
- If your campaign is for a specific product from your brand, make sure you specify this here.
- Product URL: Add your brand's URL so the creators can check out your site before they approve.

Once you've filled out your campaign details, click Continue to booking to build your cart.
Here you can browse available dates by month, selecting available spots that work best for your schedule. If you filled out your Product Category on the previous page, any episodes airing ads with a competitor in that category will be listed as Unavailable.
Click Find more Shows to return to the Browse Shows page and add additional shows to your cart. Once you've completed your cart, click Proceed to checkout to finalize your order.
On the Checkout page, you'll see a breakdown of all the spots in your cart plus the full order total. Once you've confirmed all looks good, it's time to add your payment method and check out.
Paying by Card:
Add your credit card details to add a card to your account. This card will be attached to your account from this point on and can be edited via your User Settings.
Paying by Invoice:
If you require a standard insertion order and invoicing process, contact your ad rep. They can either book your cart for you after the IO is signed, or set up your account so you have the ability to reserve a cart.
If you've requested the ability to reserve a cart for 48 hours, your Checkout page will look like this:
Once your cart is reserved, those ad spots will be locked for 48 hours so others cannot purchase them. Our accounts team will reach out to confirm the order and you'll have those two days to complete the IO process before ads are made available to all users again.
Once your campaign has been fully booked, whether by card or invoicing, it will appear on your Dashboard.
Your Dashboard populates with all your active and inactive campaigns. From here, you can navigate to a campaign to add copy points, listen to airchecks, or add more spots.
Check out this article to learn about how to Prepare For Your Campaign.
Prepare For Your Campaign
Last updated 4/3/2023
Once your campaign has been booked, head over to your Campaign dashboard. Here you'll be able to edit scripts, listen to airchecks, and extend your campaign.
If you need to relay any product ordering instructions to the hosts, contact your account manager once the campaign is booked. They can help make any arrangements to help ensure the hosts receive product in time for the read.
Check out this article to learn how to update copy for your campaign.
Extend Your Campaign
Last updated 4/3/2023
If you've seen success and would like add more dates to an existing campaign, head to the campaign's dashboard and either:
- Add Episodes: If you click this button next to a specific show in your campaign, it will take you to the cart builder for that show.
- Add Shows: If you click this, it will take you to the Browse Shows page and will create a cart with the existing campaign's details for any new show you choose.
Once your new episodes or shows look good, Proceed to checkout and pay via your preferred method!